
Cosmetic upgrades like quartz countertops, designer tile, and statement lighting make a house look current for five or ten years, yet they do nothing to protect you from rising energy costs, severe weather, or mobility changes decades down the road. True long-term homeownership requires shifting your budget from surface aesthetics to the foundational systems hidden behind your drywall and along your exterior shell.
Future-proofing rests on three core pillars: climate resilience against extreme weather, whole-home electrification and efficiency, and universal design for safe aging in place. Addressing structural vulnerabilities and aging mechanical infrastructure early prevents emergency repairs, stabilizes utility bills, and ensures your property remains comfortable and livable for decades without forcing relocation later in life.
Upgrade to Class 4 Impact-Resistant Shingles and Sealed Roof Decks

Your roof serves as the primary shield protecting every structural beam, insulation batt, and interior finish below it. Standard three-tab asphalt shingles typically begin curling, shedding granules, and losing wind resistance after fifteen years, leaving your attic vulnerable during storms. Upgrading to UL 2218 Class 4 impact-resistant architectural shingles, standing-seam metal panels, or synthetic slate extends roof lifespan to forty or fifty years while often qualifying for insurance discounts.
- Install a self-adhering ice-and-water membrane: Apply a continuous rubberized asphalt barrier along eaves, valleys, chimneys, and across the roof deck in high-wind or heavy-snow regions to stop wind-driven rain from penetrating nail holes.
- Balance intake and exhaust ventilation: Pair continuous soffit vents with baffled ridge vents to keep attic temperatures consistent year-round, preventing summer heat buildup and winter ice dams.
- Upgrade flashing to heavy-gauge metal: Replace thin aluminum step and counterflashing with 24-gauge galvanized steel or copper around skylights and wall intersections.
Before laying new material, have licensed roofing services inspect the underlying plywood or OSB sheathing for delamination and soft spots, replacing compromised panels and securing manufacturer-backed high-wind warranties.
Replace Aging Cladding with Fiber Cement and Rainscreen Systems
Exterior siding does far more than define curb appeal; it acts as your home’s thermal jacket and moisture barrier. Traditional wood clapboard demands frequent scraping and repainting to ward off rot and carpenter ants, while thin vinyl panels warp under intense sun, crack in sub-zero cold, and melt during brush fires. Replacing worn cladding with fiber cement boards or engineered wood composites gives your exterior decades of resistance against pests, hail, rot, and embers.
- Create a ventilated rainscreen gap: Install vertical furring strips over housewrap before fastening siding so bulk water drains freely and trapped humidity evaporates before rotting wall sheathing.
- Add continuous exterior rigid insulation: Layer polyiso or mineral wool foam boards across exterior studs to eliminate thermal bridging and boost whole-wall R-values without sacrificing interior space.
- Specify factory-applied baked finishes: Choose pre-finished boards cured in controlled factory ovens to resist UV fading and chalking for fifteen to twenty years between maintenance coats.
Partnering with experienced local siding contractors ensures your exterior envelope is installed according to regional wind-load codes, with proper kickout flashing and expansion clearances around trim.
Swap Drafty Panes for Triple-Glazed, Low-E Units
Windows account for roughly 25 to 30 percent of residential heating and cooling energy loss, making older single-pane or failed double-pane units a major drain on comfort. Modern high-performance windows transform drafty rooms into quiet, evenly conditioned spaces while protecting hardwood floors and upholstery from ultraviolet damage. Look beyond frame aesthetics and evaluate National Fenestration Rating Council labels to match glass performance to your climate zone.
- Target low U-factors and climate-matched SHGC: Select a U-factor of 0.22 or lower for superior insulation, and adjust the Solar Heat Gain Coefficient—low in hot southern climates to block summer heat, or moderate in northern zones to capture winter warmth.
- Choose dimensionally stable frame materials: Opt for pultruded fiberglass, wood-clad composites, or thermally broken aluminum frames that resist expanding, contracting, and breaking gas seals over thirty-plus years.
- Specify triple-pane glass with argon or krypton fills: Add a third pane of low-emissivity coated glass to cut street noise and eliminate cold interior glass surfaces during winter freezes.
Even top-rated glass underperforms if air leaks around the frame, so hire a certified window contractor who uses sloped sill pans, flashing tape, and low-expansion closed-cell foam insulation.
Widen Entryways to 36 Inches and Install Zero-Step Thresholds
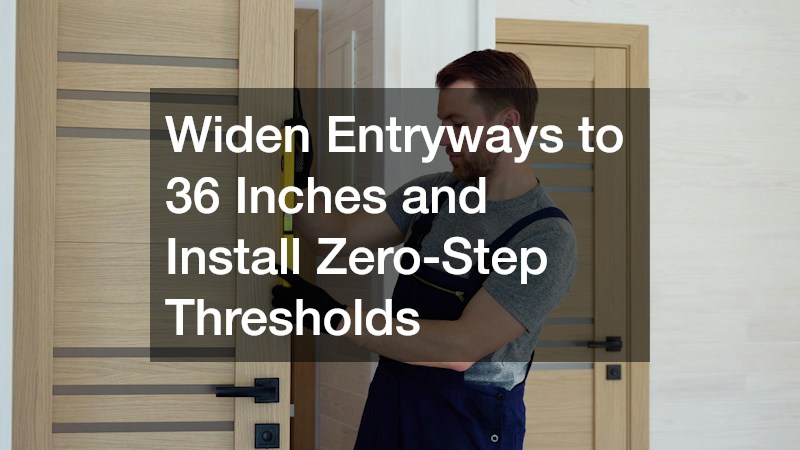
Designing for lifelong accessibility is far cheaper and less disruptive when incorporated into planned renovations rather than rushed after an injury or mobility change. Standard 28-inch and 30-inch interior doors create narrow bottlenecks that impede walkers, wheelchairs, and bulky furniture or medical equipment. Framing primary exterior entrances, hallways, and first-floor bathroom doorways to a clear 36-inch width creates effortless movement for every stage of life.
- Eliminate raised exterior door sills: Construct at least one primary entry with a zero-step threshold and gently sloped landing so rolling carts, strollers, and wheelchairs enter smoothly without tripping hazards.
- Replace round doorknobs with lever handles: Swap twisting knobs throughout the house for ergonomic levers that open easily with an elbow, closed fist, or arthritic hands.
- Upgrade to multi-point locking insulated slabs: Select fiberglass-clad or heavy-gauge steel exterior doors with polyurethane foam cores, compression weatherstripping, and smart keypad deadbolts for keyless convenience.
Coordinating structural rough-opening adjustments and precision weatherproofing through professional door installations ensures your wider entryways remain airtight, secure against forced entry, and smooth-swinging for decades.
Upgrade to a 200-Amp Service Panel and Pre-Wire for Heavy Loads
As households transition away from fossil-fuel appliances toward clean electric alternatives, older 100-amp and 150-amp electrical panels quickly become bottlenecks. Supporting an electric vehicle charger, induction range, heat pump dryer, and workshop tools simultaneously requires robust capacity and clean power distribution. Upgrading your main service entrance to at least 200 amps—or 400 amps for larger properties—gives your home the backbone needed for decades of growth.
- Install whole-panel surge protection: Mount a Type 2 surge protective device at the main breaker box to shield sensitive appliance control boards, computers, and smart thermostats from voltage spikes.
- Add AFCI and GFCI breaker protection: Bring older branch circuits up to modern safety standards with arc-fault and ground-fault interrupters that detect frayed wiring or moisture hazards before fires start.
- Run empty PVC conduit to key zones: Lay spare 1-inch conduit from the main panel to the garage, attic, and exterior utility wall while walls are open so future solar inverters or chargers can be pulled without removing drywall.
Always rely on licensed residential electricians to coordinate utility meter upgrades, verify grounding electrode systems, and balance high-draw 240-volt circuits safely.
Automate Emergency Backup Power with Automatic Transfer Switches
Aging transmission grids and severe weather events have made multi-day blackouts a realistic threat across nearly every region. Portable gas-powered units require dragging heavy equipment into storms, storing volatile fuel cans, and running extension cords through cracked windows. A permanently installed standby system eliminates manual intervention, keeping critical household infrastructure running seamlessly whether you are asleep upstairs or traveling abroad.
- Conduct a whole-home load calculation: Inventory high-wattage starting loads—such as well pumps, sump pumps, central air conditioners, and refrigerators—to size backup capacity accurately without overloading the alternator.
- Connect to a reliable continuous fuel source: Plumb the unit directly into an existing natural gas line or dedicated high-capacity underground liquid propane tank so power never runs out during prolonged emergencies.
- Pair with an automatic transfer switch: Install a smart transfer switch beside your main breaker panel that detects utility voltage drops within seconds, isolates your home from the grid, and restores power automatically.
Investing in permanently installed whole house generators protects finished basements from flooded sump pits, preserves refrigerated medications, and maintains safe indoor temperatures during winter ice storms or summer heatwaves.
Transition to Variable-Speed Heat Pumps and Zoned Ductwork

Conventional single-stage furnaces and air conditioners operate like light switches, blasting at full capacity until the thermostat is satisfied and shutting off abruptly. This cycling wastes electricity, creates uneven hot and cold spots across floors, and leaves indoor air humid in summer. Modern cold-climate variable-speed heat pumps modulate compressor output in small increments, delivering ultra-efficient heating and cooling even when outdoor temperatures plunge below freezing.
- Seal and insulate leaky supply and return ducts: Apply mastic sealant to sheet-metal joints and wrap unconditioned attic or crawlspace ductwork in R-8 insulation to stop losing up to 30 percent of conditioned air.
- Install motorized zone dampers: Divide multi-story homes into independent temperature zones so you avoid over-conditioning empty guest rooms while keeping primary living spaces comfortable.
- Integrate an Energy Recovery Ventilator: Pair your air handler with an ERV and MERV 13 media filtration to bring in fresh, filtered outdoor air while recovering heat and balancing indoor humidity.
Before purchasing equipment, book comprehensive HVAC service that includes a room-by-room Manual J load calculation to guarantee proper sizing, quiet airflow, and peak seasonal efficiency.
Eliminate Standby Heat Loss with Tankless or Hybrid Heat Pump Tanks
Standard storage-tank water heaters continuously burn gas or electricity twenty-four hours a day just to keep forty to fifty gallons of water hot while nobody uses it. Worse, traditional steel tanks rarely last beyond ten to twelve years before internal corrosion triggers sudden basement flooding. Upgrading to high-efficiency water heating cuts utility bills dramatically while eliminating the risk of unexpected tank ruptures.
- Compare hybrid heat pump and tankless models: Choose a hybrid electric heat pump tank for warm basements or garages—pulling ambient heat from the air to run three times more efficiently than standard electric models—or select a condensing tankless unit for endless hot water and space savings.
- Add a dedicated hot-water recirculation loop: Install a demand-activated recirculation pump with an under-sink crossover valve so hot water reaches distant showers in seconds rather than wasting gallons down the drain.
- Protect floors with smart leak shutoffs: Mount an automatic motorized valve and floor moisture sensor on the cold-water supply line to halt water flow immediately if a leak develops.
Proper water heater installation requires verifying gas-line sizing, stainless-steel venting, or dedicated 240-volt electrical circuits alongside a code-compliant thermal expansion tank and condensate drain.
Treat Incoming Water at the Main Line Based on Lab Testing
Municipal treatment plants disinfect water to make it safe at the tap, yet residual chlorine, chloramines, dissolved calcium, magnesium, and trace heavy metals steadily degrade plumbing from the inside out. Hard mineral scale coats heating elements, clogs low-flow showerhead nozzles, and shortens the lifespan of dishwashers and washing machines. Testing your water at an independent laboratory lets you target exact contaminants at the main entry point before water reaches a single pipe.
- Start with a spin-down sediment pre-filter: Capture sand, rust flakes, and municipal pipe debris right after the main shutoff valve to protect downstream cartridges and ceramic faucet valves.
- Use catalytic carbon for chemical removal: Run incoming water through an activated catalytic carbon tank to strip out chlorine, chloramines, volatile organic compounds, and odors throughout the house.
- Condition hard minerals to prevent scale buildup: Pair your carbon filter with a salt-based ion-exchange softener or template-assisted crystallization conditioner to stop limescale from choking copper and PEX supply lines.
Selecting a whole-house home water filtration system engineered for your household’s peak gallons-per-minute flow rate guarantees crisp, clean water at every tap without pressure drops during busy mornings.
Camera-Inspect and Reinforce Sewer Lines Before Laying New Floors

Nothing undermines a costly kitchen or basement remodel faster than discovering a collapsed main sewer lateral beneath brand-new hardwood planks or porcelain tile. Homes built over thirty years ago frequently rely on vitrified clay, cast iron, or bituminous fiber pipes that shift with soil movement, corrode internally, and attract invasive tree roots at every joint. Inspecting and rehabilitating underground drainage infrastructure before finishing interior spaces saves tens of thousands of dollars in future demolition.
- Schedule a high-definition fiber-optic camera inspection: Send a self-leveling video camera from your main cleanout to the street connection to pinpoint root intrusion, bellied pipe sections, or hairline cracks before backups occur.
- Consider trenchless Cured-In-Place Pipe lining: Restore deteriorated underground pipes by inserting an epoxy-saturated felt liner that inflates and cures into a seamless, joint-free pipe inside the old host line without digging up landscaping.
- Install a main-line backwater valve: Fit a one-way flapper valve on your primary sewer exit to block overloaded municipal storm sewers from surging backward into finished basement living areas during storms.
Scheduling preventative drain services to hydro-jet stubborn grease buildup and install accessible exterior cleanouts ensures your wastewater system stays clear and easily serviceable for decades.
Future-proofing a forever home works best when you build from the outside in and behind the walls first. Securing your roof, exterior cladding, windows, electrical capacity, and underground plumbing creates a resilient, high-efficiency shell that protects every cosmetic finish you add later.
Rather than tackling every upgrade at once, organize your priorities into a realistic three-to-five-year capital improvement roadmap. Bundling overlapping exterior trades—such as coordinating window replacements alongside new siding and exterior insulation—reduces scaffolding setup fees and ensures seamless weatherproofing between building components. Start this season by booking a comprehensive home energy audit and mechanical inspection so you can invest your renovation dollars where they deliver the greatest safety, durability, and long-term comfort.